Learning to Use ViPER-GT
What is ViPER-GT?
The Video Performance Evaluation Resource Kit’s Ground Truth tool, or ViPER-GT, allows someone to annotate a video with metadata, mainly for use as ground truth for performance evaluation. This includes information describing the file, such as date of filming and keywords about its content. It also includes concrete features, such as scene breaks and bounding boxes around people. This can be used for any number of purposes. We use it both for evaluation and to support a media database application.
For example, say you are developing an algorithm that tracks people moving about. You can use ViPER-GT to go through by hand and mark up a few sample videos to test the quality of your algorithm's output (preferrably using viper-pe, the performance evaluation / video metadata comparison tool). ViPER-GT will let you define boxes around people, and its architecture, for those who know how to program Java and so inclined, allows integration with other tools. You may find it useful to browse your results, as well.
What sort of annotations can ViPER display?
ViPER-GT is designed for editing visual annotation, such as rectangles denoting locations of people on screen. The current shapes include points, bounding boxes and oriented rectangles, ellipses, polygons and circles. There are also types without a visual element, including text strings, numbers, and boolean values.
Data elements are combined together into objects called descriptors. This allows you to define a person type, which has a text string (the person's name), a bounding box (their location), and any other number of attributes. Descriptors usually refer to a single object, event or other thing in the file that is worthy of evaluation, but they may also have more abstract purposes, such as indicating key frames. For those of you who are familiar with databases, a single descriptor is analogous to a row in a relational database. If you follow the Semantic Web, it is like an Individual in OWL. Our current data set includes descriptors for human faces, walking people, lines of text, and scene cuts. In addition to these types, all files have a single descriptor that gives metadata about the media file as a whole, including frame rate, file name, image size in pixels, and an optional comment.
ViPER-GT maintains a set of descriptors associated to various source media files. You can have one annotation file that describes several different media files, although it is often useful to have a one-to-one mapping of media file to annotation file. It also presents a schema editor for describing what kinds of descriptors you may mark up. Perhaps the easiest way to see how ViPER manages video metadata is to use it; this document will help you through a sample session.
Installation
For information about how to install ViPER-GT, refer to the ViPER Quick Start Guide or to the INSTALL file that is in the ViPER distribution. All that this document refers to is included in ViPER-Light, and that is the recommended package for Windows users or people who are not running any experiments.
A ViPER-GT Tutorial
It is helpful to think of the three classes of users for ViPER. There are the evaluators and the algorithm designers, who are the audience of the ground truth author; they depend both upon the veracity and the utility of the ground truth. Second are the truth schema designers; often program heads or committees, the schema designer must determine what data is of interest in the video and how to describe it. Finally, there is the author of the ground truth herself or himself; she or he must use the tool to annotate up the video while following the designers’ guidelines. While any one person may take on all roles, it is useful to think of them separately for the purposes of this document. The first section of this tutorial uses the browsing functionality of the tool, using the sample data available on the web site. Next, the editing features are introduced. Finally, the latter sections are dedicated to schema design and more useful to the designer and evaluator.
Starting ViPER-GT
Run ViPER-GT using the instructions found in the Quick Start Guide. It will load an empty metadata file, with only one descriptor type defined in the schema, the default FILE descriptor. As explained above, a descriptor is a basic object of metadata, and can take a variety of user-defined attributes. Since no media file is loaded, nothing will be displayed, and no descriptor instances may exist.
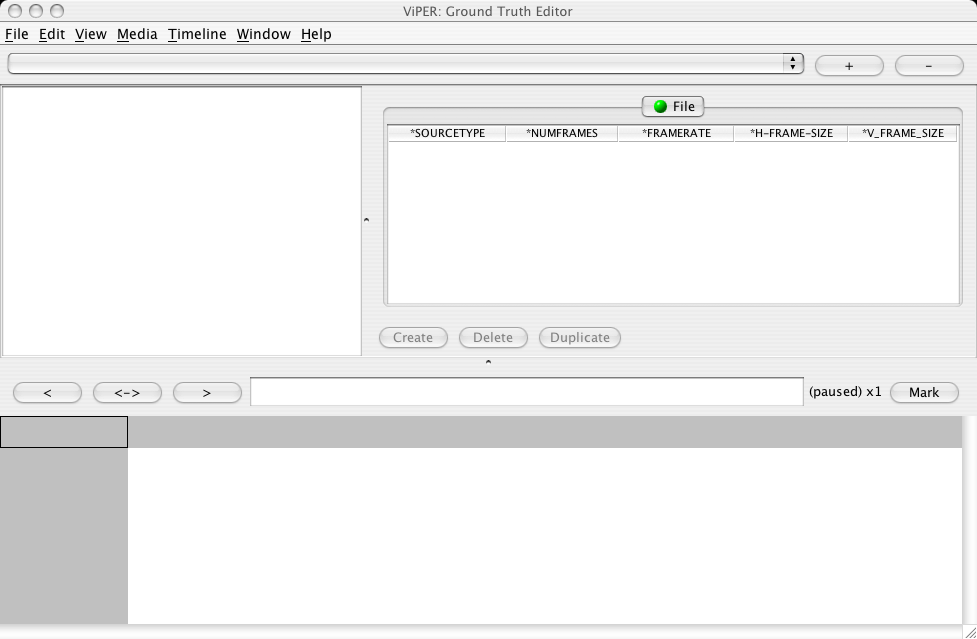
Figure 1: An Empty Metadata File. The state of ViPER-GT upon startup.
Take a look around the screen. There is not much to see yet; no video is loaded, so the display is mostly empty. To get started, let's load a metadata file. ViPER metadata is stored seperately from the media files, and it contains references to the media files it loads, as an HTML page contains references to the images it loads. Powerpoint used to do the same thing, but now the media is stored within the slide files (to avoid the annoying 'cannot find media' problems when you copy the slideshow file). So, let's open a metadata file.
Browsing the File
Go to the viper home page and download the sample metadata and video files. Click File - Open Existing Metadata.... This brings up an 'Open' dialog box. Navigate to the sample viper xml file that you downloaded (sample.xgtf), select it, and click the 'Open' button.
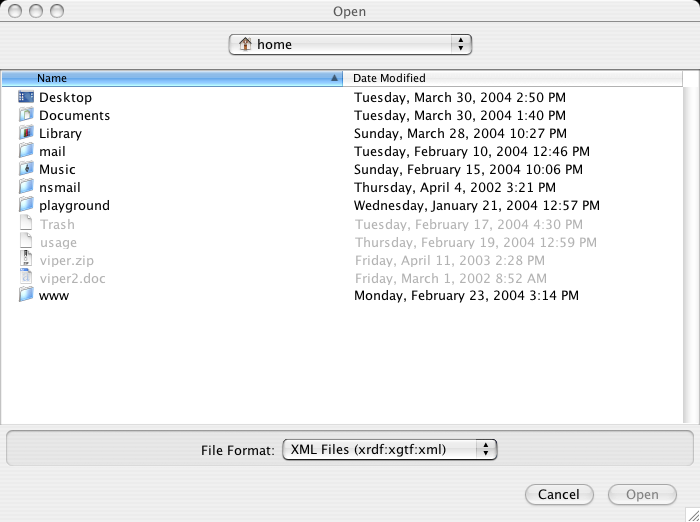
Figure 2: The File Open Dialog.
A message box will appear asking for the location of the media file. Browse and select the downloaded sample.mpg file. (While you are browsing, it is searching your file system for the file; it may find it before you browse to it.)
Figure 3: The Find Media File Dialog.
After the media file is found on the hard disk, it is then loaded into memory. This might take some time, especially for longer movies. A dialog box will appear indicating what file is currently loading. After the file is loaded, your display should look something like this:
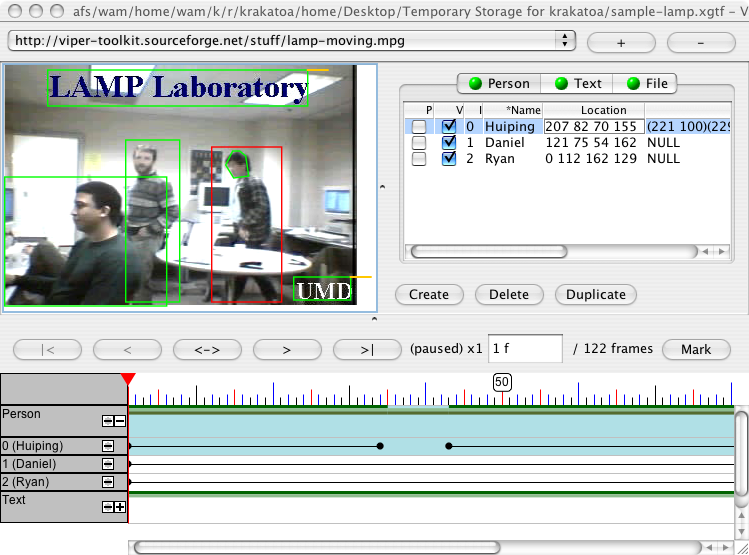
Figure 4: The Sample File, Loaded.
At the top of the frame is a pull-down menu that shows the name of the currently loaded video file; this panel, the source media selector, also allows the user to edit the list of described media files. The video frame view is in the upper-left quadrant of the screen; this displays the video with spatial annotations. To the right of the video frame is the spreadsheet view, which displays the annotations as a table. Beneath these two views of the data is the timeline view, which displays summary of the video annotation, indicating when descriptors are marked as valid.
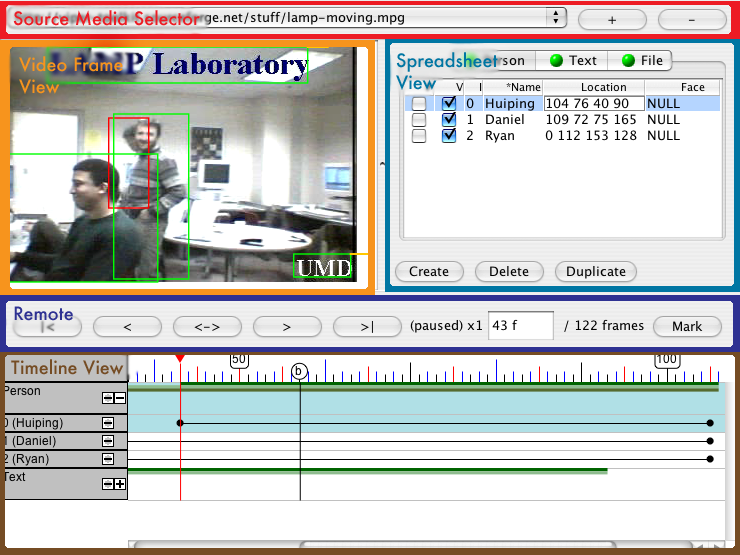
Figure 5: Map to the Interface
First, let's look at the video frame. Here, you can see the first frame of the video. There is not much to see, besides some scene text (displayed backwards on the glass). Move the mouse over the frame and use the scroll wheel to zoom in and zoom out (scrolling up zooms in, down zooms out). To pan around the video, press the scroll wheel down and drag the mouse in the direction you want to go. The left mouse button may be used to directly edit the spatial annotations (the boxes around the text, in this case). The right button brings up a context menu, if one applies. For more detailed information about how to use the video frame view, see the Using the Video Frame View section of the manual.
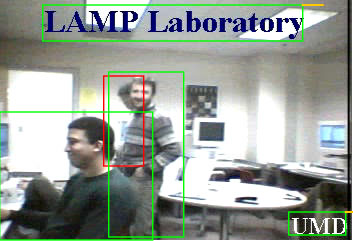
Figure 6: The Video Frame View
To the right of the video frame is the spreadsheet view. Across the top are tabs for each descriptor type. In the sample video, these are 'Text', 'Person', and 'File'. Each table has a row for each instance of the descriptor type. You can edit all the values directly in the table, but some of the values may also be edited on the video frame view or the timeline view. For more information about what the columns mean, or how to edit data, see the Spreadsheet View section.
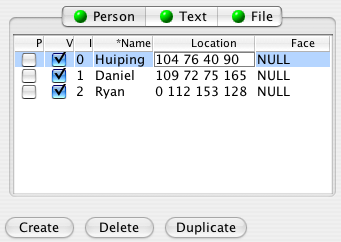
Figure 7: The Spreadsheet View
Below the frame and spreadsheet views is the timeline view. It displays a summary of the entire video. There is a summary line for each type of descriptor, which can be expanded to show when each descriptor of that type is declared to be valid. It is also possible to use the red arrow marker to scrub the video. For more information about how to use the timeline, see the Timeline View section below.

Figure 8: The Timeline View
To play the movie, use the remote buttons located above the timeline. You can use the buttons to accelerate or decelerate the playback. The center button toggles between play and paused states. Press the play button to go start the video playback. For more information, see the Remote and navigation sections in the manual.

Figure 9: The Remote
The first thing to notice about the video is the shapes overlaid atop it. Each shape represents the value of a descriptor's attribute. In the case of the sample file, these are either Location boxes for text or Body and Torso boxes for people. In order to see the other properties associated with a box, click on it to select it. It will turn red, and the corresponding descriptor will appear highlighted in the spreadsheet view. If you selected a text block, this will allow you to edit the associated text string, or indicate that the text has a readability factor of three, for example.
Look down at the timeline. There are two sections of green, one labelled 'Text' and the other labeled 'Person'. Click the plus-sign icon next to 'Person' to expand the timelines for the person descriptors. There is a timeline for each descriptor. The black lines indicate where the person exists, or, rather, where the corresponding descriptor is marked as valid. The green lines offer a summary view of each descriptor type. Like the video frame, you can zoom into this view using the scroll-wheel on your mouse. While the video is playing, you can click the 'Mark' button to leave a labelled mark at that frame in the video. Later, you can use that mark as a bookmark, by right-clicking on it and selecting 'Go to Mark' from the pop-up menu. This bookmark feature is useful for a variety of reasons that will be described later in the propagation and timeline sections.
You may notice that the video frame view gets rather crowded, especially when Huiping walks behind Daniel. Because of this, it is sometimes necessary to hide annotation that is irrelevant to your current interest. Along the top of the spreadsheet view are tabs, each labelled with a red or green ball. The red ball indicates that the spatial representation of all descriptors of that type should not be displayed. For example, you may click the 'Person' tab to make the people disappear.
Editing the File
Now that you have an understanding of how to navigate the video and
what kinds of annotation you can make, let's try to edit the
annotations. Make sure the video is paused (it will say (paused)
next to the frame number above the
timeline). Drag the red slider back to the first frame, or type 1
in the frame number box and press Enter. This will take the
video back to the first frame.
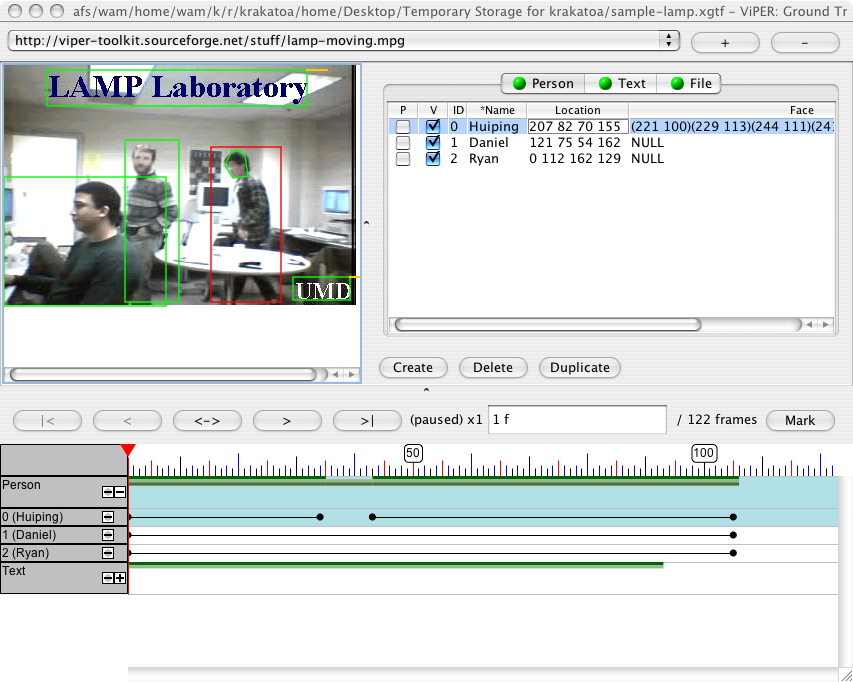
Figure 10: The First Frame of the Sample File.
It is possible to click and modify the boxes around the text on the first frame directly. When you select a box, it changes color to indicate that it selected. You may notice that the the spreadsheet view changes to reflect your selection - the row of the descriptor instance you have selected should appear highlighted to indicate its selection, while the value of the box should be highlighted with another color to indicate the selected attribute. As you drag the boxes around and change their shapes, the corresponding values change in the spreadsheet view. If you type a different value into the spreadsheet, its display on the video frame will likewise change. For information about editing the shapes, see the section on editing spatial attributes. If you want to type a value into the spreadsheet, the section describing the different attribute types includes information on the text format.
If you press delete while you have a shape selected, it will remove the shape. However, it won't remove the descriptor. Instead, it sets the attribute value to NULL.
A descriptor instance has a valid range - the frames on which
the descriptor applies. The timeline shows when each descriptor is
marked valid. If you look in the spreadsheet view, a
valid descriptor has a check in the V column while an
invalid descriptor does not. An invalid descriptor is also rendered in
italics. Clicking the V checkbox or dragging the
descriptor's timeline are both ways of making the box disappear,
as well. If you wish to remove an entire descriptor instance, click
the Delete
button in the spreadsheet view while the descriptor
is selected.
Now, let's create a new descriptor. Since all the people and text
regions are already marked up, select a text region descriptor in the
spreadsheet view, then click the Delete
button to remove it.
Click
Create
to make a new, empty text box descriptor. Its first
attribute
should immediately be selected. You can click and type in the value of
the text string. Then, click the Location field (now labelled with a
NULL), and then draw a new box in the video frame. Since the text is
specified as an oriented box, you first
draw the top line of the rectangle, and then specify the height of the
rectangle. If you get lost, you can always hit Ctrl+Z to
undo your actions. If you want to see a list of the changes you've
made, open the Undo History; look under the Window menu. Double-click
an item to undo or redo changes to that point.
Now you should know enough to do frame-by-frame editing. There are a variety of tricks to speed up this process. First among them is the concept of propagation - copying the value of a descriptor at one frame to another frame, and all the frames in between. The P column in the spreadsheet view turns on auto-propagate for the selected descriptor. Using this, it is possible to step through the video the first time through, a frame at a time, editing each descriptor slightly at each frame. But be careful; it is easy enough to leave auto-propagate selected and erase your previous work. [TODO: need a way to only propagate selected attributes]
Instead of auto-propagating, it is also posible to simply drag a spatial attribute through the video while it is playing back. This will work even if the descriptor is not set to autopropagate. When dragging with the mouse to move a shape on the video frame view, type p on your keyboard to start playback. While the movie is playing, ViPER-GT will record the position of the shape.
For more information about propagation, autopropagation, and interpolation, see the section on propagation and interpolation.
To add a source video to annotate, click the +
button next
to the source media selector. If you would like to load another video,
you can download something from archive.org or the viper
site. The current system supports only MPEG-1,
but it may support additional formats if you have QuickTime for Java
installed. The windows version also supports MPEG-2, using the included
VirtualDub4Java library. To remove the currently displayed media file,
use the -
button next to the pulldown.
Editing the Schema
So, now you know the basics of how to open and browse a file. What if you want to create your own descriptor type?
First, let's start from scratch, selecting the New Metadata
item from the File
menu. To define your own descriptor type,
select the Show Schema Editor
menu option from the Windows
menu. This will bring up a list of
the
current descriptors. Click Add New Descriptor
to add a new
type. This
will create a simple default descriptor type without any attributes. In
the right panel, you will see the information about the new descriptor.
From this table, you can change the name of the descriptor and its
type. For example, change the type to OBJECT
and the name to Person
.
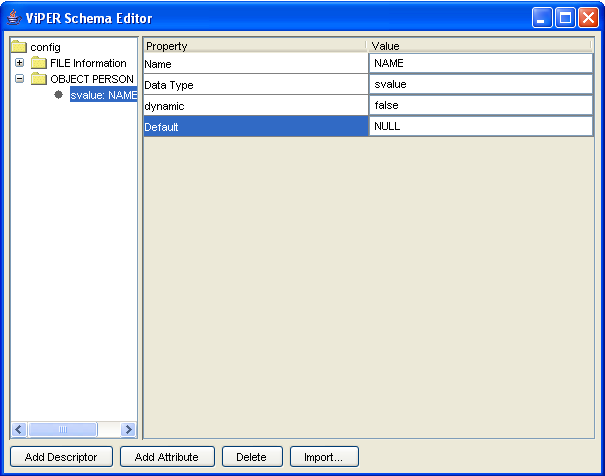
Figure 11: The Schema Editor
Add two attributes by clicking the Add Attribute
button
twice,
while the new Person
descriptor is selected. This will create
two
generic attributes. Select the first attribute in the tree view,
bringing its property panel up. You can modify its name and attributes
in the property panel. Make the first attribute a named Name
.
Make
sure that it is a static attribute (this means that it cannot change
over time) and is an svalue type – a text string. Select the second
attribute to bring up its properties, then change its name to
Location
; also make it dynamic (set dynamic
to true
)
and change
the type to bbox. This will create a new descriptor type that can put a
box around a named person in the video.
To create an instance of this descriptor, you must first load a
video.
Click the +
button from the sourcefile selector and browse
for a video. Then, when the video has loaded, select the Person
tab in the spreadsheet view, and click Create
. You can now give
the
Person a name in the spreadsheet view, then select the NULL Location
field
and draw a location in the video frame view.
For a description about what the different types of descriptors (File, Content, and Object), see the document describing the ViPER file format, and the manual section on editing a schema.

